


This tutorial is part one of a serie.
Part 1 : Create the account and exclude MFA
Part 2 : Configure Microsoft Cloud App Security
Every decent admin-account has MFA enabled to log on into the Azure or Office365 Portal. It is crucial to enable this, no doubt about that.
But what if the Azure MFA is not working at the time you need it?

In 2018 this happened a few times, see this article and this article. So I found some blogs on how to setup an emergency account, but I also configured Microsoft Cloud App Security to send me notifications when this account is used.
This inspired me to write a blog post on how I did this.
This post will be divided in 6 topics:
What do we need
Guidelines
Create account
Disable MFA
Configure Identity Protection
Configure MCAS
This will be a long blogpost, so there will be two parts on how to set this up.
Let’s start with part 1. Create the account and configure MFA.
1. What do we need?
First of all, we need the following features of AzureAD:
Multi Factor Authentication
Microsoft Cloud App Security
AzureAD Identity Protection
MCAS is a features of AzureAD P1 and Identity Protection is a feature of AzureAD P2. So if you have AzureAD P2, then you are settled. But it is possible to buy seperate AzureAD licenses and you can use it for eg. only your tenant admin-accounts.
2. Guidelines
Below you will find some security and configuration guidelines for the emergency account.
Security Guideline
Should have a complex password
There should be a list of admins that are allowed to use this account
Preferable at least 2 accounts in your tenant
Store the passwords in a safe place intern or extern your company
Monitor the sign-ins -> We will do this with MCAS
Configuration Guideline
Must have the Global Administrator role assigned
Must have password set to never expire
Must not have MFA configured
Must be excluded from ALL Conditional Access policies
Must be a cloud-only account
Should use the tenants *.onmicrosoft.com domain
Should not be synchronized with on-prem AD
Should not be connected with any employee-supplied mobile phones or hardware tokens.
3. Create Account
Go to the Azure Portal -> Azure Active Directory -> Users
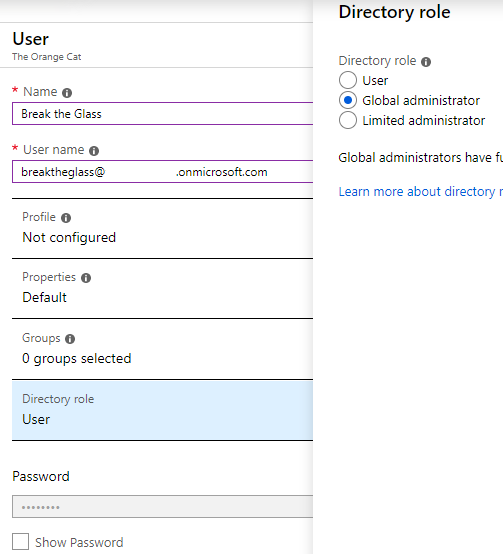
Create a breaktheglass account and make sure you use yours tenant domain (@yourdomain.onmicrosoft.com) as UPN
Give the newly created user the Global Administrator Role
Copy the new user name and the new generated password to your favorite text editor, because we need this in the next step
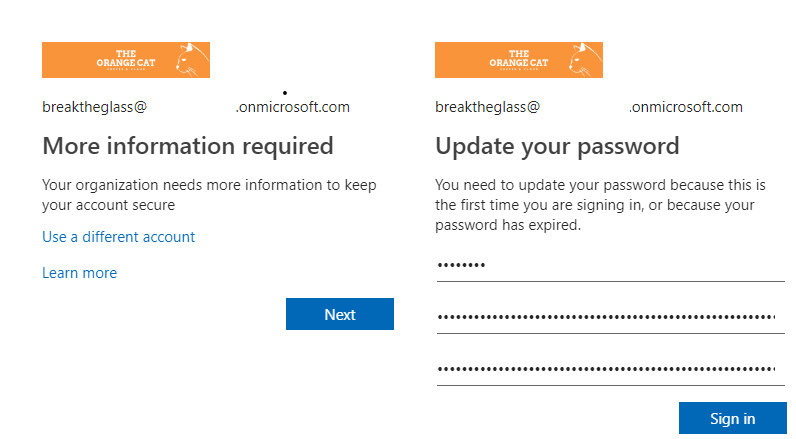
Open a new InPrivate browser and logon with the new breaktheglass account
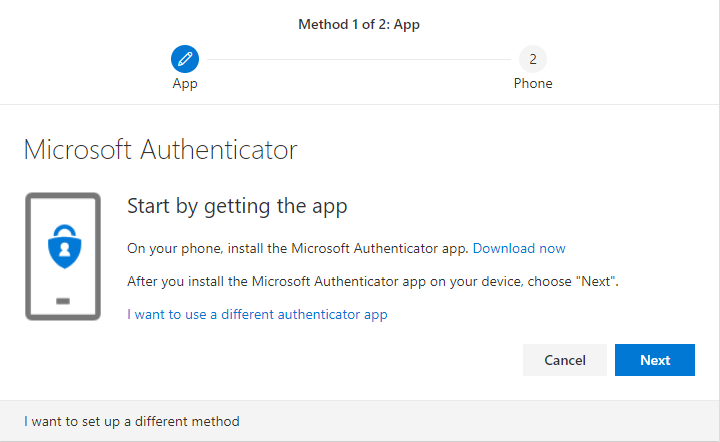
Change your password and follow the MFA configuration. We will later turn off the MFA for this account.
Sign out from the breaktheglass account and close the browser
Run this powershell command to set the password to never expire
Set-MsolUser -UserPrincipalName breakglass@domain.onmicrosoft.com
-PasswordNeverExpires $true
4. Disable MFA
Go back to the Azure Portal and sign in with your global administrator account
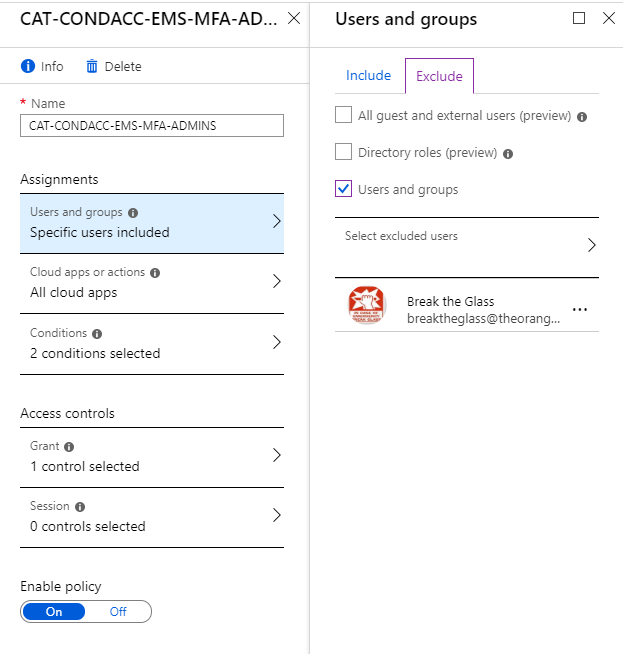
MFA will be triggered with some Conditional Access rules. Exclude this account in all the Conditional Access rules which you have created. In my example, I created a rule to force MFA on all Administrator accounts. Edit this rule and go to -> Users and Groups under Assignments -> Exclude -> Select Excluded Users and search for the breaktheglass account.
Click on Select and then click Done and Save the rule
5. Configure Identity Protection
Identity Protection is included in AzureAD P2. So we have to exclude the breaktheglass account here also.
Open the Identity Protection blade
Here you will see 3 options under Configure: MFA Registration, User Risk Policy and Sign-in Risk Policy
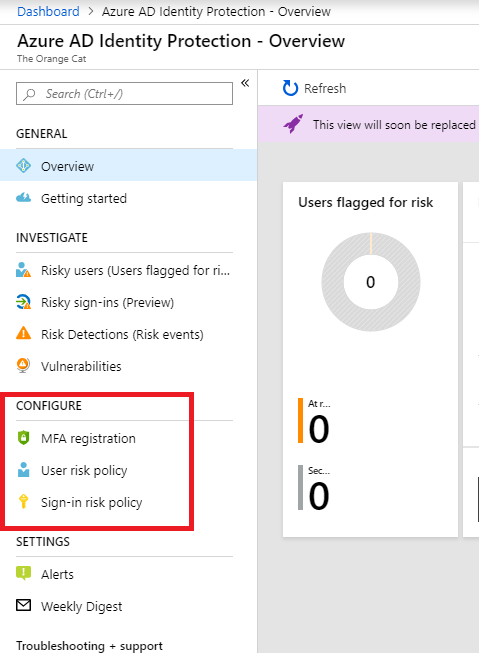
These policies are disabled by default, but we need to exclude the breaktheglass account within these policies and enable then afterwards.
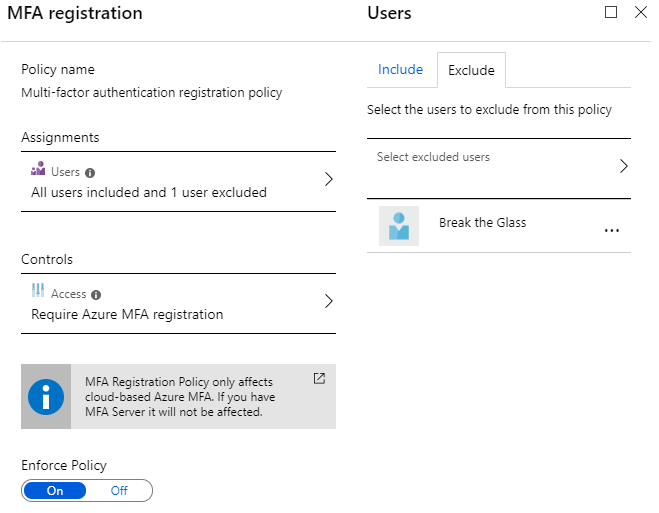
Open the MFA Registration blade -> Users -> Include all users and exclude the breaktheglass account -> Click on Done
Under Access -> Check if Require Azure MFA registration is checked
Enable the policy and save it.
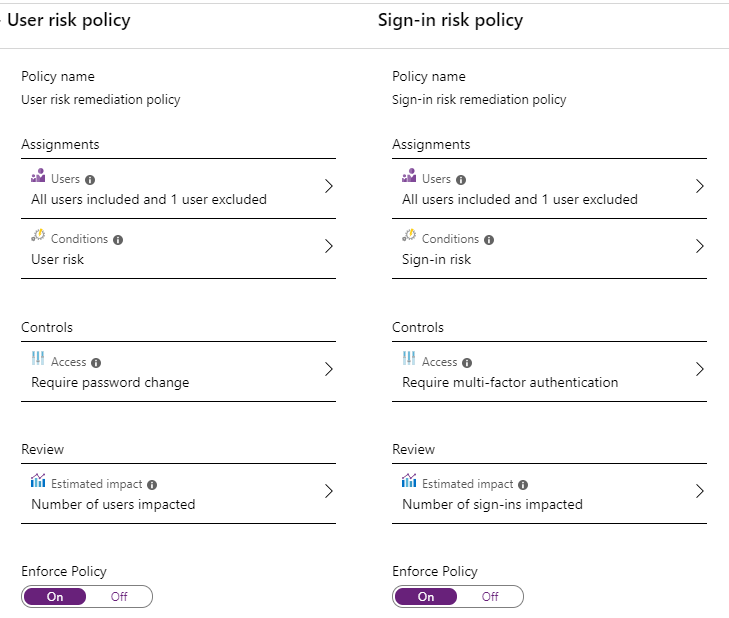
Repeat steps 13, 14 and 15 for the User Risk Policy and the Sign-in Policy.
Now we go further on part 2 of this setup. Configure MCAS.