

So, we’ve made it to the final part of the Windows 365 series.
Over the last few articles, we’ve looked at what Windows 365 is, how to deploy Windows 365 Enterprise, how to manage Cloud PCs, and how to keep them updated with Windows Autopatch.
For the final part, we’re moving away from the Cloud PC itself and looking at the device sitting on the user’s desk: Windows 365 Link.
This time, we’re not just talking about it. We’re actually going to configure it.
What is Windows 365 Link?
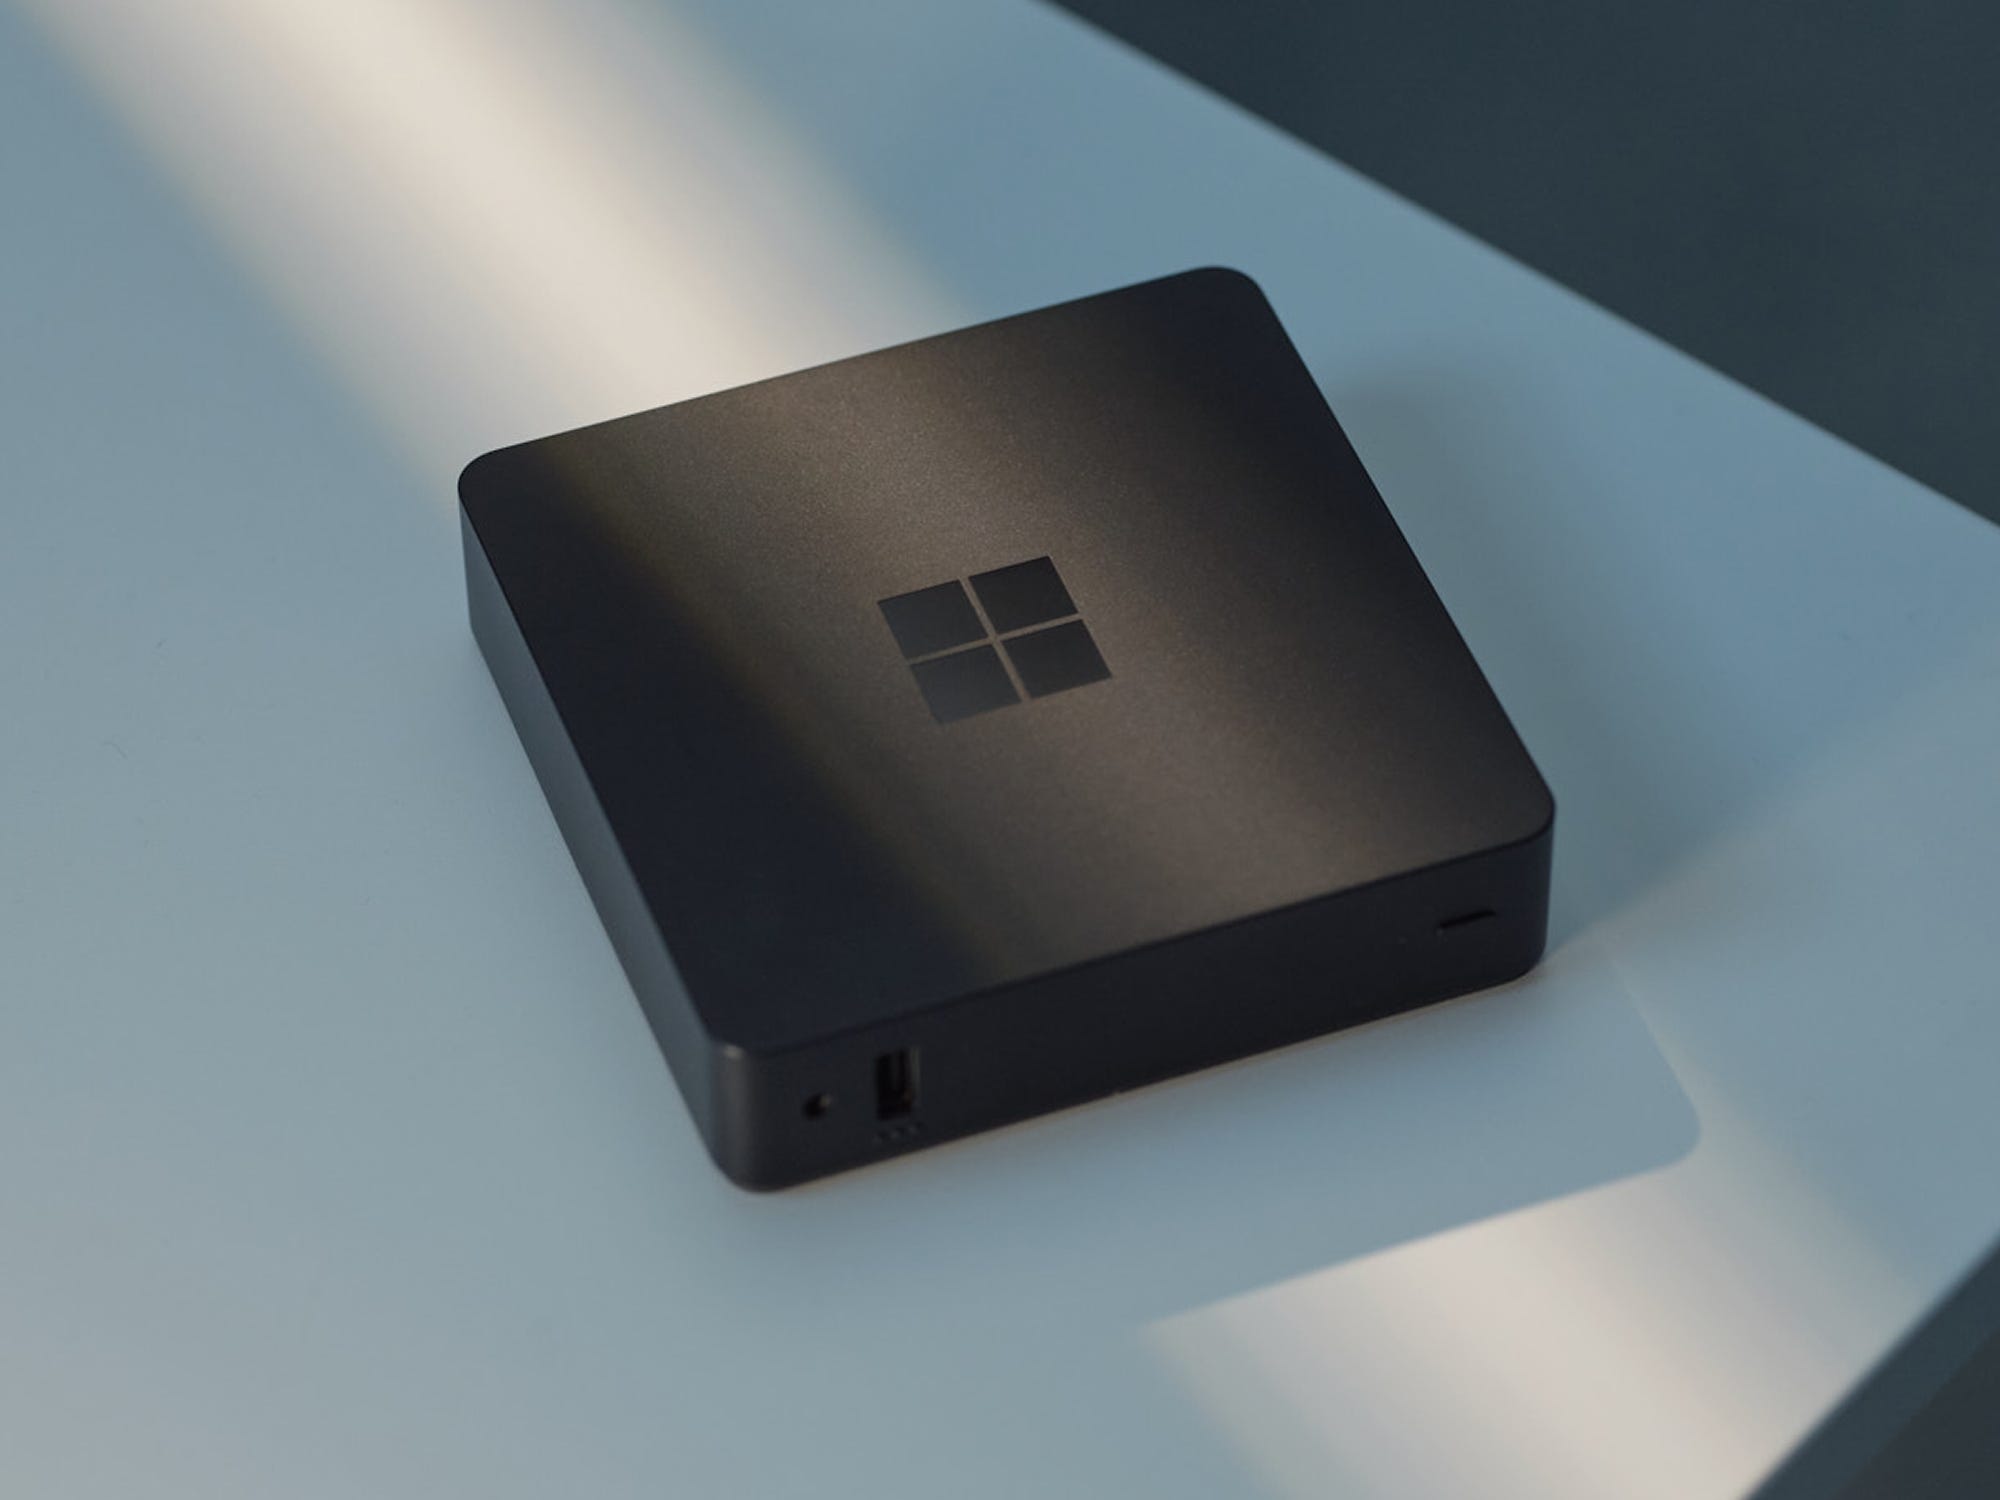
Windows 365 Link is Microsoft’s purpose-built device for connecting users to their Windows 365 Cloud PC. More information about this device, can be found here.
The concept is pretty simple.
The device doesn’t need to be a traditional Windows PC with a large collection of applications and policies. Its primary purpose is to get the user connected to their Cloud PC.
So, in reallity it is just Power on → Sign in → Connect to Cloud PC → Work.
This makes Windows 365 Link particularly interesting for scenarios such as:
Hot-desking
Shared desks
Call centers
Task workers
Meeting rooms
Organizations looking to simplify endpoint management
And because we’re already using Intune to manage our Cloud PCs, it makes sense to manage the Windows 365 Link devices there as well.
Getting started
Before configuring the device, make sure you have:
A Windows 365 Link device
Microsoft Intune
A Windows 365 Cloud PC
Microsoft Entra ID
The required Windows 365 licensing (Windows 365 Enterprise / Flex and Business)
Network connectivity
Configure SSO in a (existing) provisioning Policy
Create a dedicated device group
Before creating policies, I recommend creating a dedicated Entra ID device group for Windows 365 Link.
For example:
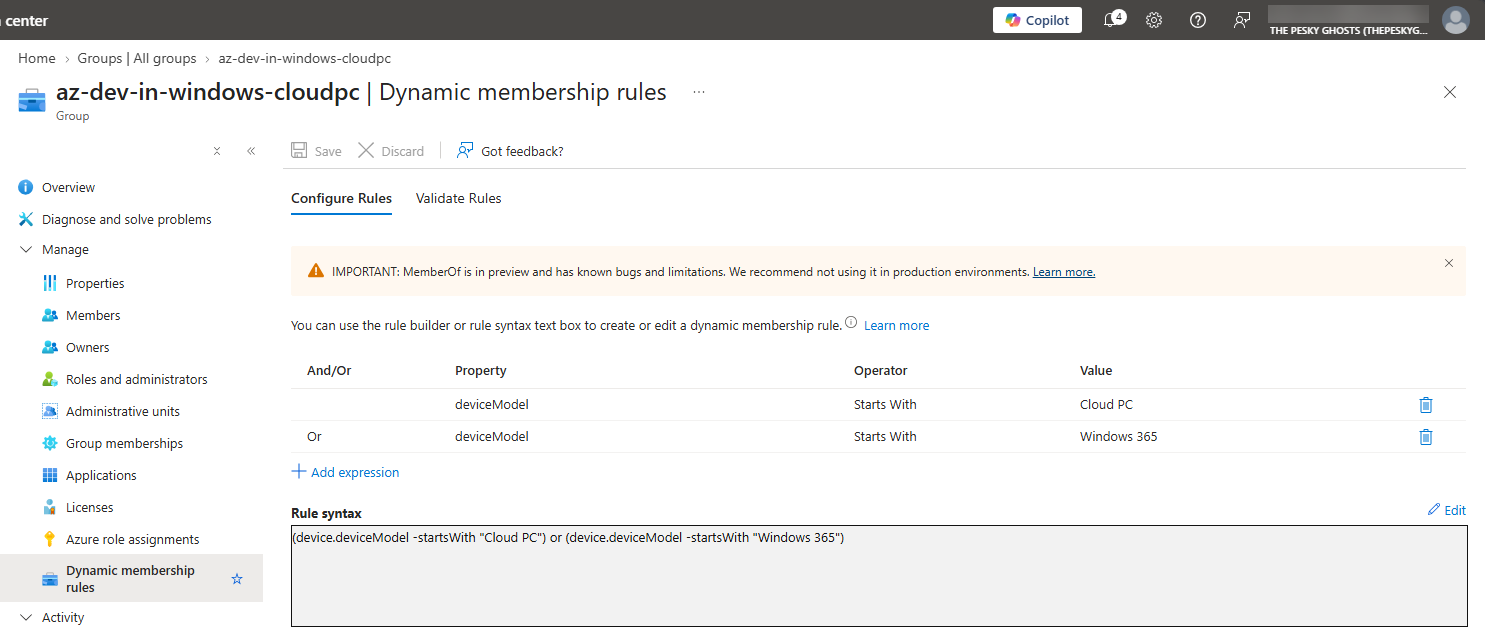
Why?
Because Windows 365 Link is not a normal Windows 11 endpoint. I don’t want my standard Windows 11 configuration profiles accidentally being applied to a Windows 365 Link.
And we need this group in the next step below.
Suppress single sign-on consent prompts
Once single sign-on (SSO) is enabled, users are asked for permission to connect to a Cloud PC for the first time. Additionally, they are reminded after a Cloud PC is reprovisioned or every 30 days. The Windows 365 Link connection fails if SSO authorization is needed to connect to a Cloud PC. Before attempting to connect from a Windows 365 Link device once more, the user must first connect to the Cloud PC using a different device or web browser and provide SSO consent.
You must configure a property on the SSO service principals in Entra ID in order to suppress the SSO consent popup and prevent this experience.
Use these actions to suppress the SSO consent prompt:
The users are not asked for permission to utilize SSO after the Cloud PCs are in the target group.
Onboard the Windows 365 Link
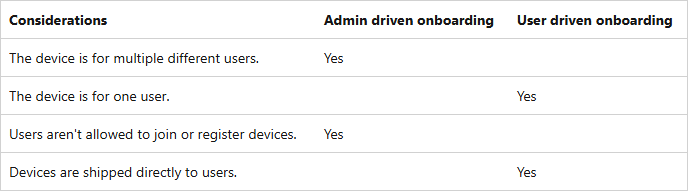
There are several options for onboarding a Windows Link device in Intune, namely:
Through a DEM account
Through the user themselves, via OOBE, but in that case, the user becomes the primary owner
Through a corporate identifier, so that the Link is treated as a corporate device
This depends entirely on the desired scenario. In my example, I’ll register it using a corporate identifier, so the device is seen as a corporate device and not as a personal device.
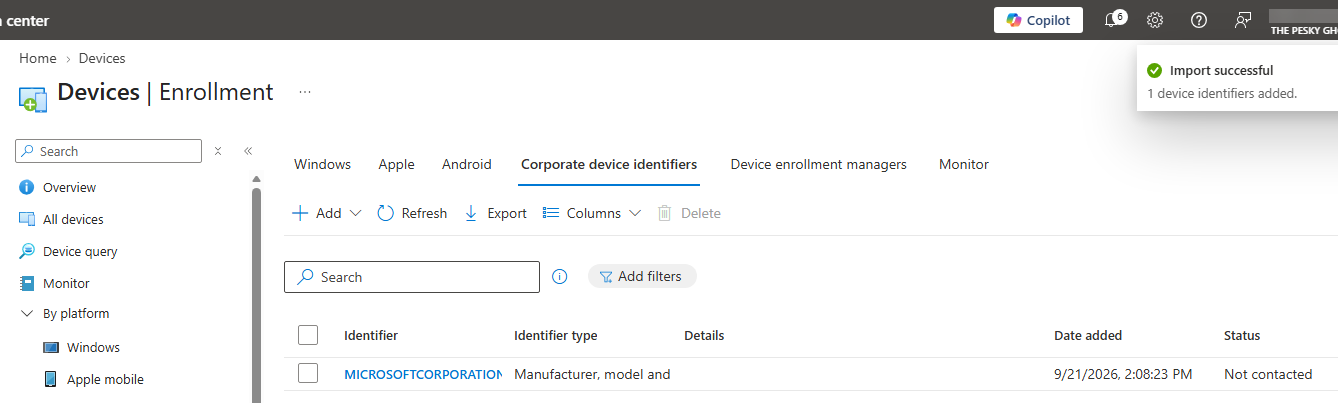
That’s why I’m creating a CSV file with the following line, which I’ll upload to Intune.
Microsoft Corporation,Windows 365 Link,01234567890123
Configure the important settings
Before we onboard the Link devices, there are three more things we need to do: detect the time zone, log in with FIDO2 keys, and, last but not least (though optional), set the screen timeout.
Oh, and a compliancy policy.
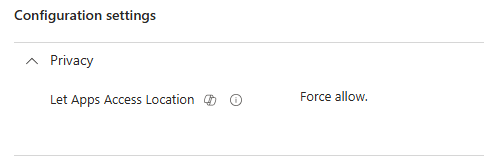
Auto detect local time zone policy
To enforce the local time zone on Link device, configure a new policy with the below setting and assign this to the Link Devices Entra ID group or the filter.
FIDO2 as sign in method
You probably already have this set up. Because, hey, we all use passwordless authentication. 😉
Screen time out
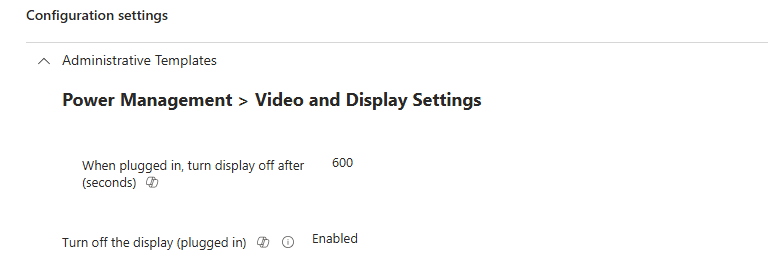
Windows 365 Link has a built-in screen timeout feature that turns off the screen after approximately five minutes of inactivity. When the user reactivates the device, this timeout appears on the sign-in page and functions the same way as a local lock event. You can customize this timeout using the “Turn off screen (plugged in)” feature in Intune, via the below setting. Assign this to the Link Devices Entra ID group or the filter.
Compliance policy
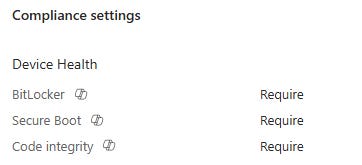
Device Health is the only compliance setting that is relevant to Windows 365 Link devices. BitLocker, Secure Boot, and Code Integrity are among the compliance settings on Windows 365 Link that are activated by default and cannot be disabled.
Are there other settings we can configure on the Link?
Absolutely.
For example, we can use Cloud PKI to deploy certificates to Link devices, thereby gaining access to a Wi-Fi network through authentication.
But we can also use a number of other CSPs, such as Privacy, Delivery Optimization, and more. You can find more information about this on the Microsoft Learn page.
What about security and updates?
Windows 365 Link is not compatible with most of Intune’s endpoint security features. The detection and response sensor for Microsoft Defender for Endpoint is part of the Windows 365 Link operating system. So, you can onboard the Windows 365 Link devices to Defender for Endpoint.
Windows 365 Link devices are automatically updated through the same Windows Update services used by Windows 11. The Windows 365 Link device regularly checks for available updates.
How updates works
When an update is available and is detected by a powered-on device, the device does the following:
The update is downloaded in the background.
It installs the update during the next restart or at 3 a.m. when the device is not in use.
Driver and firmware updates occur separately from operating system updates and are also applied during a restart.
If the device receives driver/firmware updates and operating system updates at the same time, both updates are applied during a single restart.
Checking the device in Intune
Once the device is configured, Intune gives us a central place to verify its status.
From the device page, we can review things such as:
Device information
Configuration status
Assigned policies
Compliance
Device health
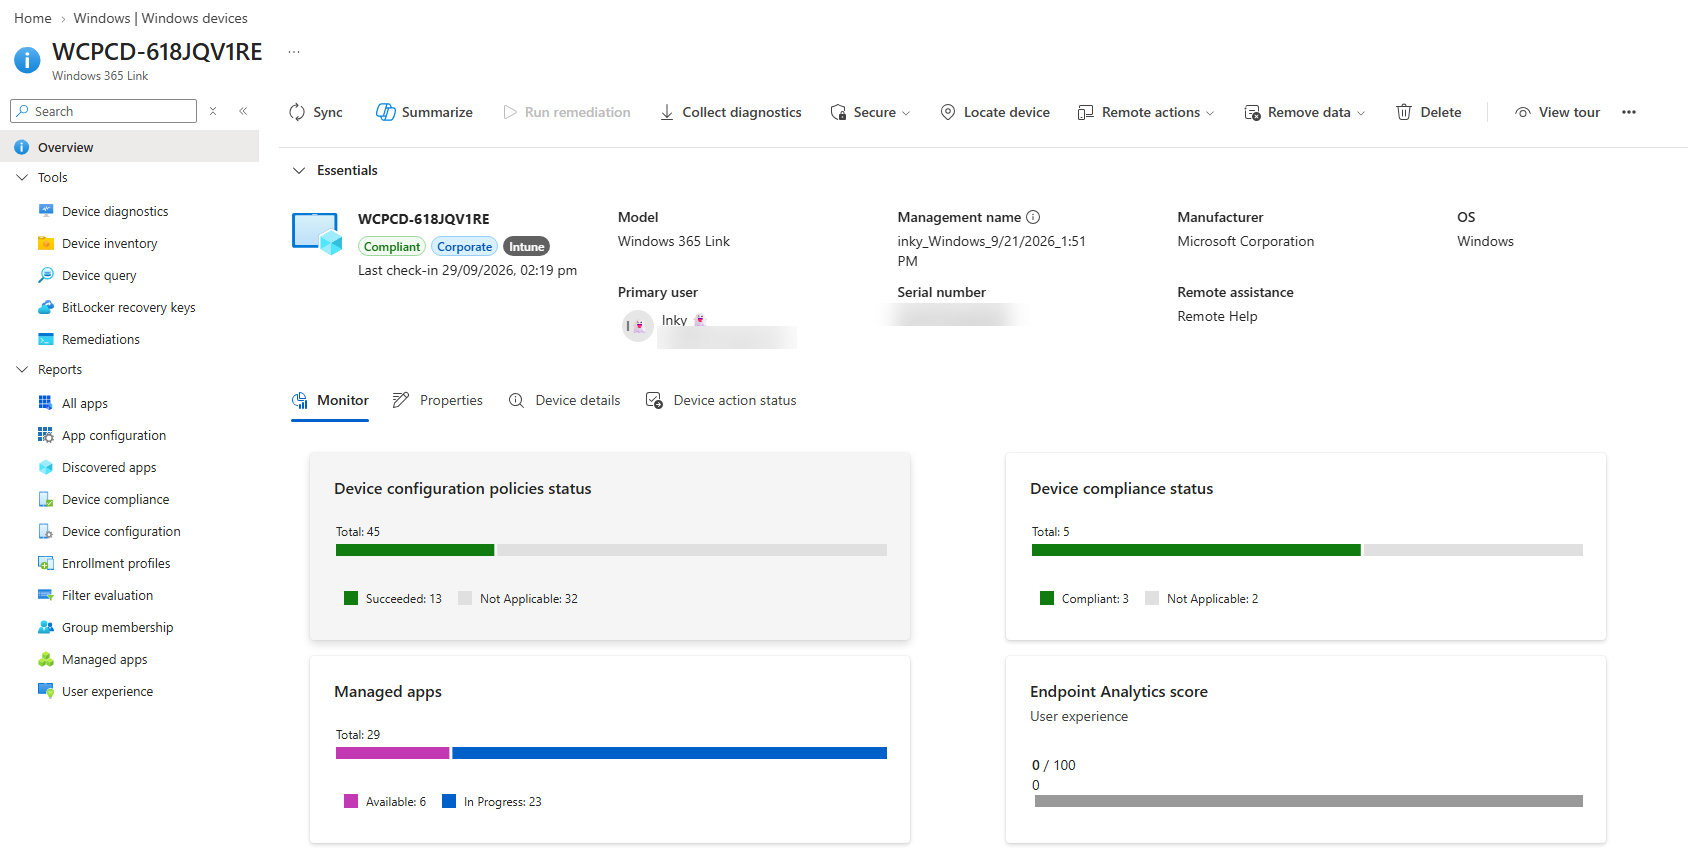
If something isn’t working, this is usually the first place I’d look.
Is the device actually receiving the policy?
Is the policy reporting an error?
Is the device compliant?
Is it checking in?
Don’t start troubleshooting the device itself before checking what’s happening in Intune.
Windows Link in action
Final thoughts
And that’s it.
We’ve reached the end of my Windows 365 series.
Over the last five articles, we’ve gone from “What exactly is Windows 365?” to actually deploying and managing it.
We’ve looked at:
Windows 365 fundamentals and licensing
Windows 365 Enterprise provisioning
Cloud PC management
Windows Autopatch
Windows 365 Link and Intune
I’ve deliberately tried to keep this series practical.
There are plenty of deeper Windows 365 topics we could explore, but the goal of this series was to cover the fundamentals and show how the different pieces fit together.
And that’s probably the thing I like most about Windows 365.
When you put everything together, the concept is actually quite simple:
Give the user a device.
Give the user a Cloud PC.
Manage both with Intune.
Use Entra ID for identity.
Let Autopatch handle the updates.
That’s a pretty compelling modern workplace story.
Thanks for following along with the series, and I hope you’ve enjoyed reading it as much as I’ve enjoyed putting it together.
And with that, Windows 365 Wednesday comes to an end. 👋