


In the first part of this series, we covered the basics of Windows 365, licensing, and the differences between Business and Enterprise.
Now it’s time to actually build a Windows 365 Enterprise environment.
Unlike Windows 365 Business, the Enterprise edition gives administrators much more control over:
networking
identity
management
security
provisioning
The tradeoff is simple:
more flexibility also means more configuration.
In this post, I’ll walk through the core components required to successfully deploy Windows 365 Enterprise using Microsoft Intune.
I’ll cover:
prerequisites
networking
Azure Network Connection
provisioning policies
images
assignments
common deployment mistakes
Understanding the architecture
A Windows 365 Enterprise deployment consists of several components working together:
Microsoft Intune
Microsoft Entra ID
Windows 365 licensing
provisioning policies
Cloud PC images
At a high level, the provisioning flow looks like this:
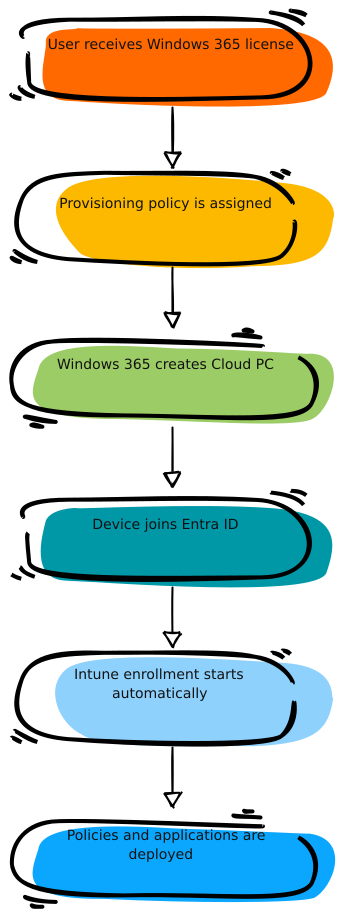
From an administrator perspective, most of the work happens before the first Cloud PC is created.
Good preparation prevents most provisioning failures later on.
Prerequisites
Before configuring anything, validate the following requirements.
Required components
At minimum you need:
a Windows 365 Enterprise license
Microsoft Intune
Microsoft Entra ID
supported networking
administrative permissions
In most modern environments, this is already enough to start deploying Cloud PCs relatively quickly.
One of the biggest advantages of Windows 365 Enterprise is that administrators can keep the deployment relatively straightforward while still maintaining enterprise-grade management capabilities.
💡Windows 365 Enterprise also supports more advanced networking scenarios through Azure Network Connection (ANC), allowing Cloud PCs to connect directly to Azure virtual networks and internal resources. While powerful, ANC also introduces additional dependencies around networking, DNS, and connectivity. For this blog series, we’ll focus on the simpler and more modern deployment approach first.
Provisioning policies explained
Provisioning policies define how Cloud PCs are created. Think of them as the deployment blueprint. A provisioning policy controls:
region
image
join type
language settings
assignments
Without a provisioning policy, no Cloud PCs will be created.
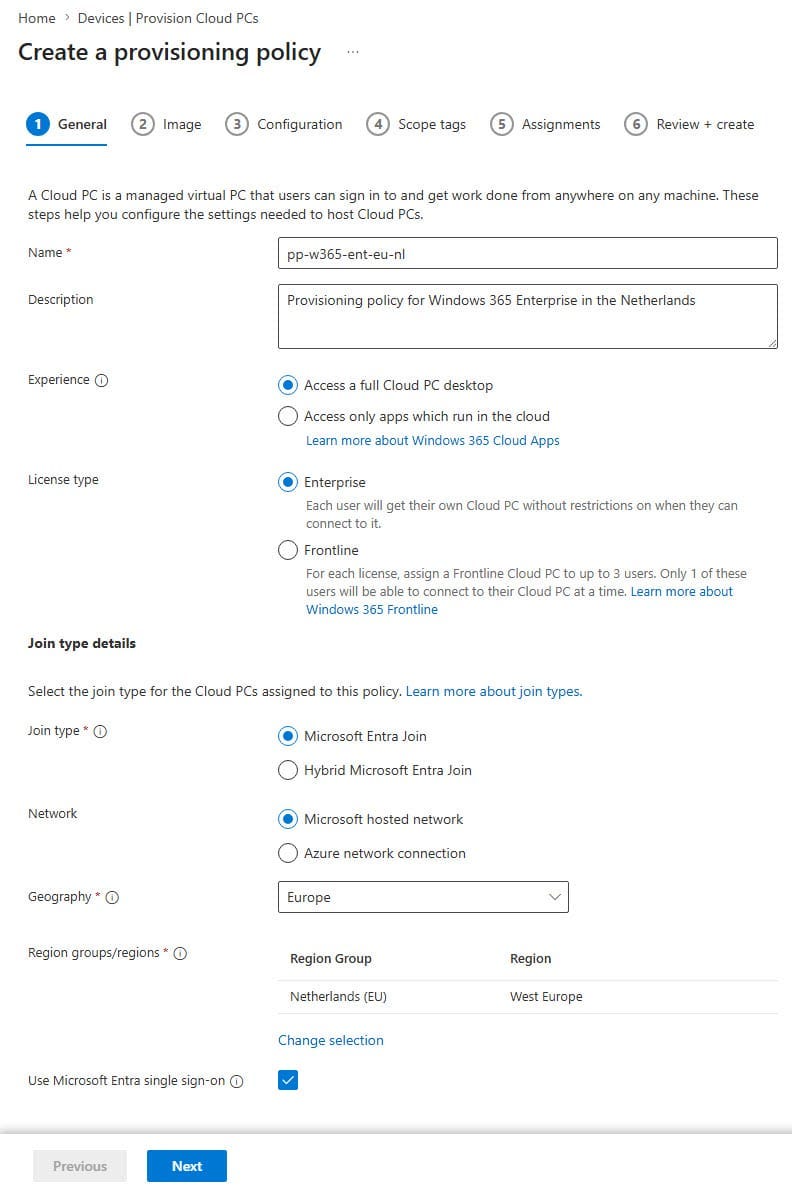
Creating a provisioning policy
Inside Intune, navigate to -> Devices -> Manage Windows 365 Cloud PCs -> Provision Cloud PCs
Click on Create policy
In the Name field, give the policy the desired name
Choose at Experience, in this example, for Access a full Cloud PC Desktop
At License type, click Enterprise.
At Join type, click Microsoft Entra Join
At Network, click Microsoft hosted network
Choose your Geography and regions
Check the box for Microsoft Entra Single sign-on
Click Next
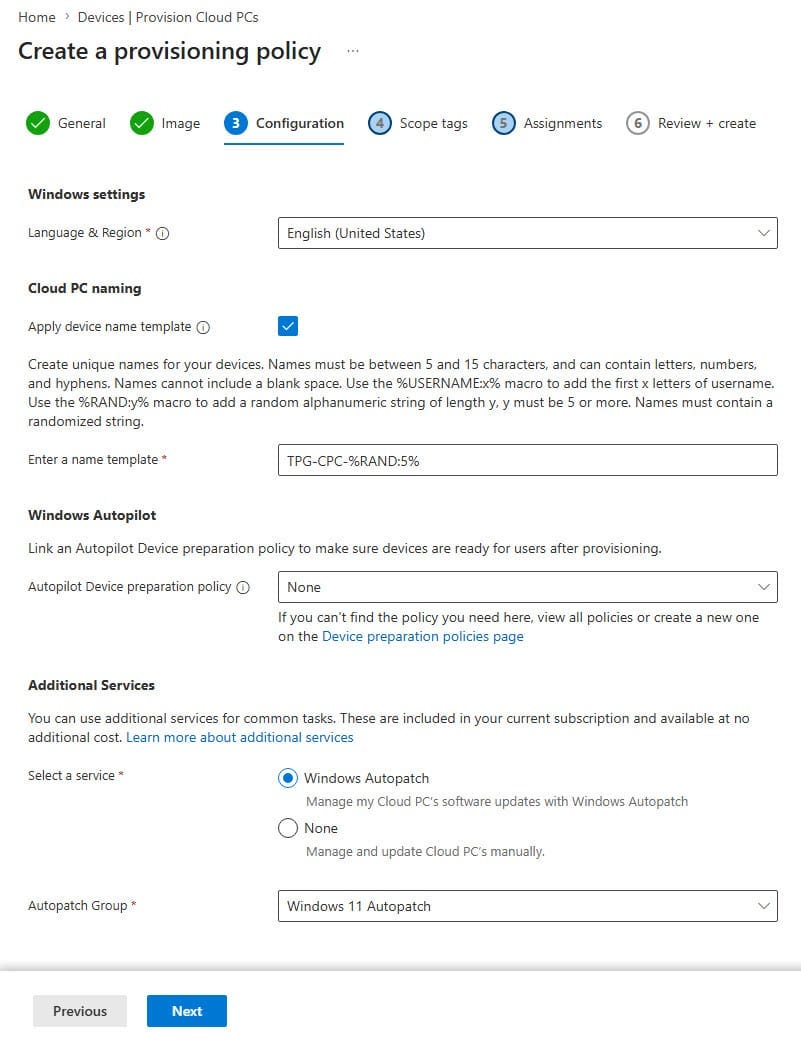
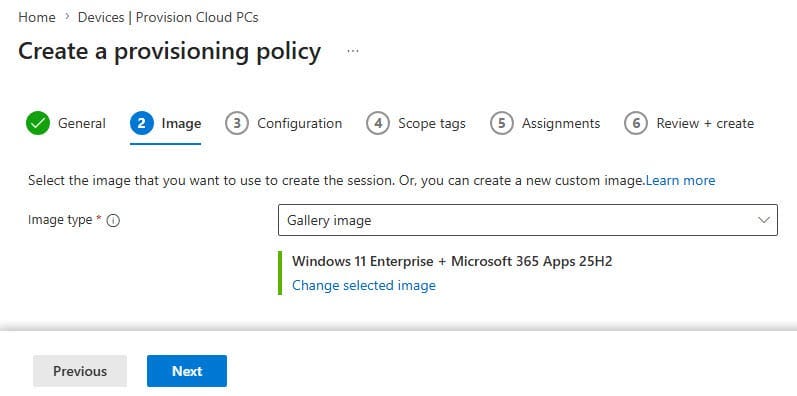
Choose an Image type
Choose the Language & Region
Create a Device name template
Optional: Link an Autopilot Device preparation policy
At Additional Services, I choose for Autopatch, because I have that running in this tenant.
Click Next
Click Next.
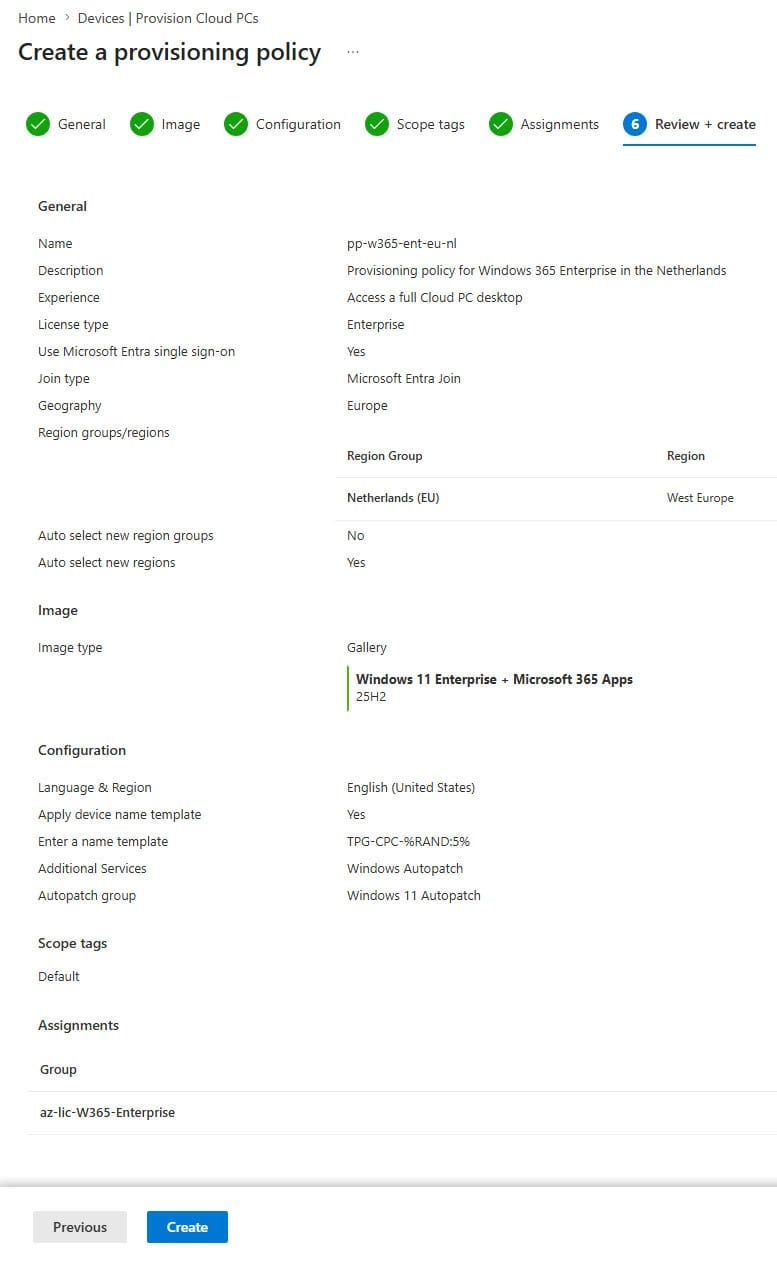
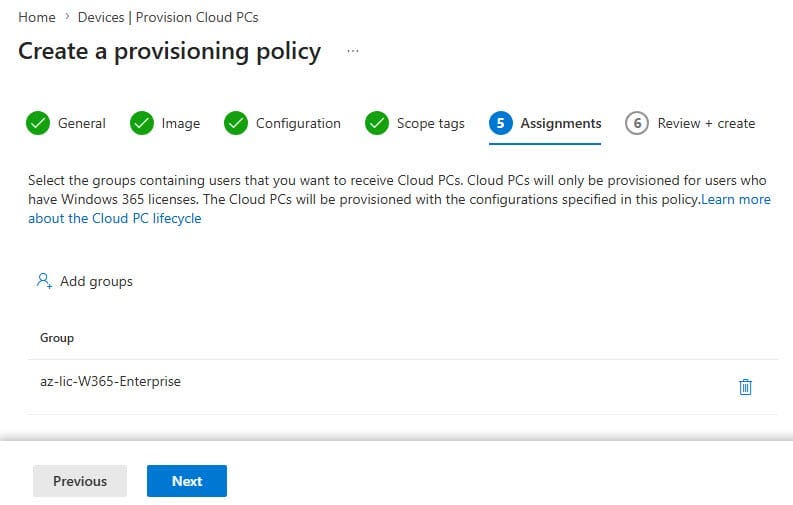
Assign the policy to the group of licensed users
Review the settings and click Next
For most deployments, the default Microsoft-hosted networking configuration is more than sufficient and keeps the deployment process much simpler.
Selecting images
Windows 365 supports multiple image options.
Gallery images
Microsoft provides prebuilt images including:
Windows 11
Microsoft 365 Apps
Teams optimization
These are the easiest to maintain and are ideal for most deployments.
Custom images
Organizations can also deploy their own images.
This is useful for:
preinstalled applications
hardened configurations
specialized workloads
legacy software requirements
My recommendation:
Start with gallery images unless there is a strong business reason not to.
Custom images increase operational overhead quickly.
Assigning users
Once the provisioning policy is configured, assignments determine who receives a Cloud PC. Typically this is done using:
Entra ID groups
dynamic groups
department-based assignments
As soon as:
the user has a valid license
and receives the provisioning policy
the Cloud PC deployment starts automatically.
Provisioning usually takes between 20 minutes to several hours, depending on:
image type
deployment complexity
assigned applications and policies
Intune enrollment
After provisioning completes, the Cloud PC automatically enrolls into Intune. From there, it behaves almost like a normal Windows endpoint.
Administrators can deploy:
compliance policies
configuration profiles
applications
security baselines
Defender policies
update rings / Autopatch
This is where Windows 365 becomes especially powerful for organizations already using Intune extensively.
The management experience is very familiar for endpoint administrators because most existing Intune workflows continue to work exactly the same.
Common deployment mistakes
I’ve seen the same problems come up again and again during deployments in recent months. I'll mention a few from my experiences.
Overcomplicating the first rollout
Keep the initial deployment simple.
Do not immediately introduce:
custom images
dozens of applications
complex security baselines
advanced networking requirements
Validate the platform first.
Deploying too many applications during provisioning
Heavy application deployments can slow down the user onboarding experience significantly.
Especially large Win32 apps may delay the first login experience.
Using custom images too early
Custom images sound attractive, but they also become operationally expensive.
Many organizations can achieve the same result using:
Intune
application deployment
configuration profiles
without maintaining image lifecycles manually.
Treating Cloud PCs differently from endpoints
A Cloud PC is still a Windows endpoint. Many existing Intune and security principles still apply.
Final Thoughts
Windows 365 Enterprise is relatively straightforward once the foundational components are designed correctly.
Most deployment challenges are not caused by Windows 365 itself, but by:
unnecessary complexity
overengineering
or introducing advanced scenarios too early
My recommendation is always: start simple, validate the platform, and scale gradually.
In the next part of this series, we’ll take a closer look at Cloud PC settings, management capabilities, and the options administrators have after deployment.
That is it for now. Until next time. 👋