


In the previous part of this series, we looked at managing Cloud PCs after they have been provisioned.
Now it’s time to make sure those Cloud PCs stay up to date.
If you are already using Windows Autopatch for your Windows endpoints, the good news is that Windows 365 Enterprise Cloud PCs are fully supported. There is no need to create a separate update management strategy just because these devices run in the cloud.
In this article, I will configure Windows Autopatch for Windows 365 Enterprise Cloud PCs.
Enable Windows Autopatch for Windows 365
The easiest way to enable Autopatch for new Cloud PCs is directly from the Windows 365 provisioning policy.
Open the Microsoft Intune admin center and navigate to:
Devices → Windows 365 → Provisioning policies
Create a new provisioning policy or edit an existing one.
During the provisioning policy configuration, you will find the Additional Services section.
Enable Windows Autopatch and select an existing Autopatch group.
This registers newly provisioned Cloud PCs with Windows Autopatch automatically.
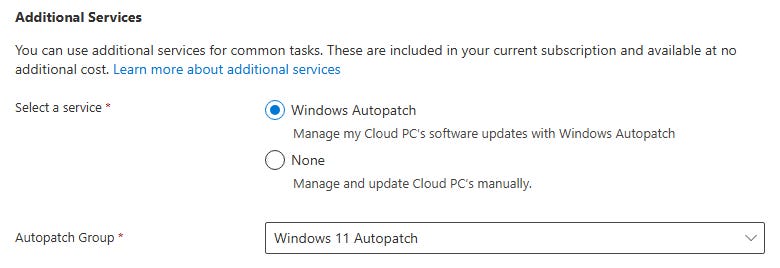
Once the provisioning policy is assigned, every new Cloud PC created through this policy will automatically be registered with Windows Autopatch.
What happens next?
That’s it.
One of the nice things about the Windows 365 and Windows Autopatch integration is that there is no additional enrollment workflow required.
When a Cloud PC is provisioned, it will automatically appear in the Windows Autopatch experience and will follow the configured update management process.
From there, administrators can monitor:
Update status
Deployment progress
Device health
Potential update issues
Checking your Cloud PCs in Windows Autopatch
After the Cloud PC has been provisioned, it’s always worth verifying that everything is working as expected.
Under the Device → Overview section, select Autopatch management status. Open the Windows Autopatch section in the Intune admin center and check your Cloud PC devices.
Things to verify:
Is the device registered?
Is the device up to date?
Are there any alerts?
Which types of updates?

Windows Autopatch helps keep Windows devices updated by managing update deployment, monitoring health, and reducing the manual effort required from administrators.
What about existing Cloud PCs?
One thing to keep in mind: enabling Windows Autopatch in a provisioning policy is mainly intended for newly created Cloud PCs.
If you already have an existing Windows 365 environment, check the current registration status of your Cloud PCs before making changes.
Don’t assume that updating a provisioning policy will automatically update existing devices.
💡Keep your Windows 365 update strategy aligned with your physical Windows endpoints.
A Cloud PC is still a Windows endpoint.
Creating completely separate update processes for physical devices and Cloud PCs increases operational complexity and makes troubleshooting harder.
Final thoughts
There isn’t much configuration needed, and that is exactly the benefit.
Windows 365 Enterprise and Windows Autopatch are designed to work together. Enable the option in your provisioning policy, provision the Cloud PC, and let Autopatch handle the update management.
Simple, consistent, and aligned with a modern workplace approach.
In the next part of this series, we will look at Windows 365 Link and Microsoft Intune, including how to configure and manage Windows 365 Link devices.
That is it for now. Until next time. 👋