


In the previous articles, we covered the fundamentals of Windows 365 and walked through the deployment of a Windows 365 Enterprise environment.
Once your Cloud PCs are provisioned, the real management begins.
Unlike a traditional physical endpoint, Windows 365 provides several management actions that can significantly reduce support time and improve the end-user experience. Features like restoring a Cloud PC, resizing it to a more powerful SKU, or restarting it remotely are all available directly from Microsoft Intune.
In this article, we'll explore the most important Cloud PC management actions, explain when you should use them, and share a few best practices from real-world deployments.
We'll cover:
Navigating to your Cloud PCs
Restarting a Cloud PC
Restoring a Cloud PC
Resizing a Cloud PC
Reviewing device information
Best practices
Where can you manage Cloud PCs?
All Cloud PC-specific management actions are available from within Microsoft Intune.
Navigate to Devices → Manage Windows 365 Cloud PCs → All Cloud PCs
Here you'll find an overview of every Cloud PC in your environment, including:
Device name
Assigned user
Provisioning status
License type
Device health
Last sign-in
Provisioning policy
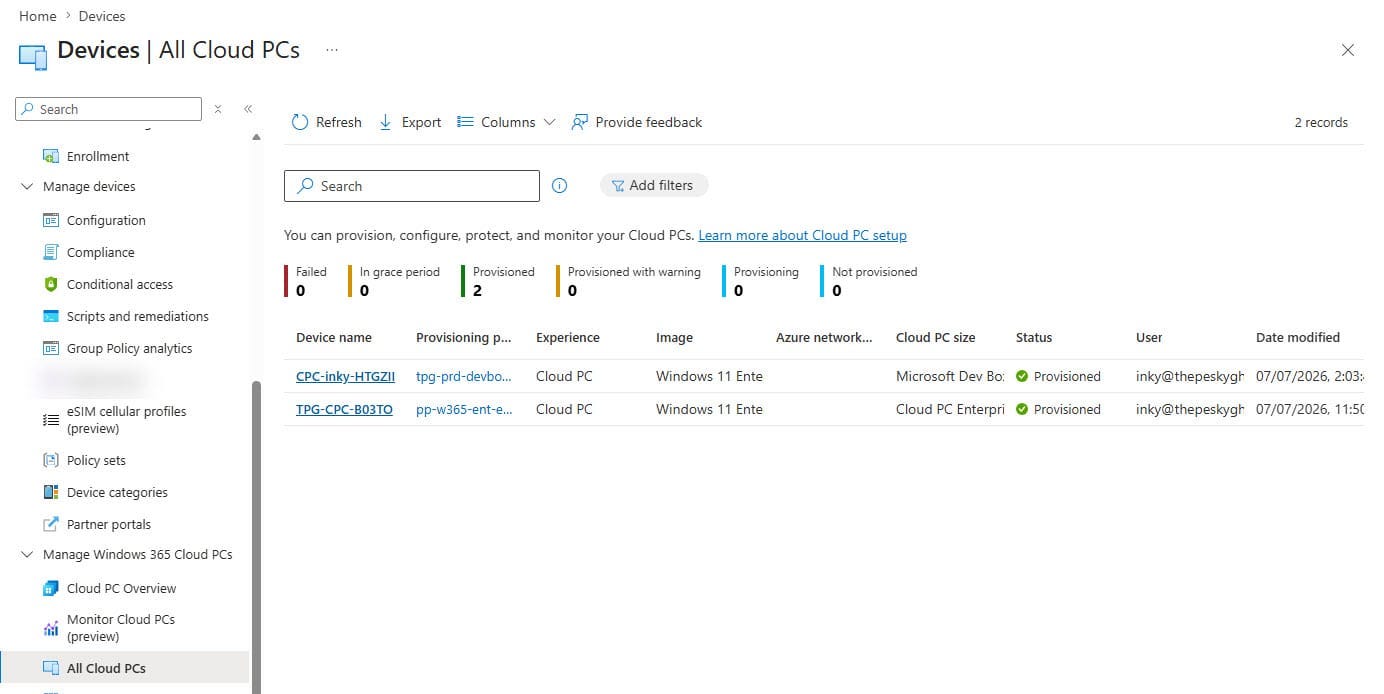
Selecting a Cloud PC opens the device management page, where you'll find all available management actions.
Restarting a Cloud PC
Sometimes the simplest solution is still the best one. Whether a Windows Update requires a reboot or an application has become unresponsive, administrators can restart a Cloud PC without requiring the user to initiate the action.
When should you use it?
Typical scenarios include:
Completing Windows Updates
Troubleshooting application issues
Refreshing system services
General maintenance
How to restart a Cloud PC
Open the Intune Admin Center.
Navigate to Devices → Manage Windows 365 Cloud PCs → All Cloud PCs.
Select the Cloud PC.
Click Restart.
Confirm the action.
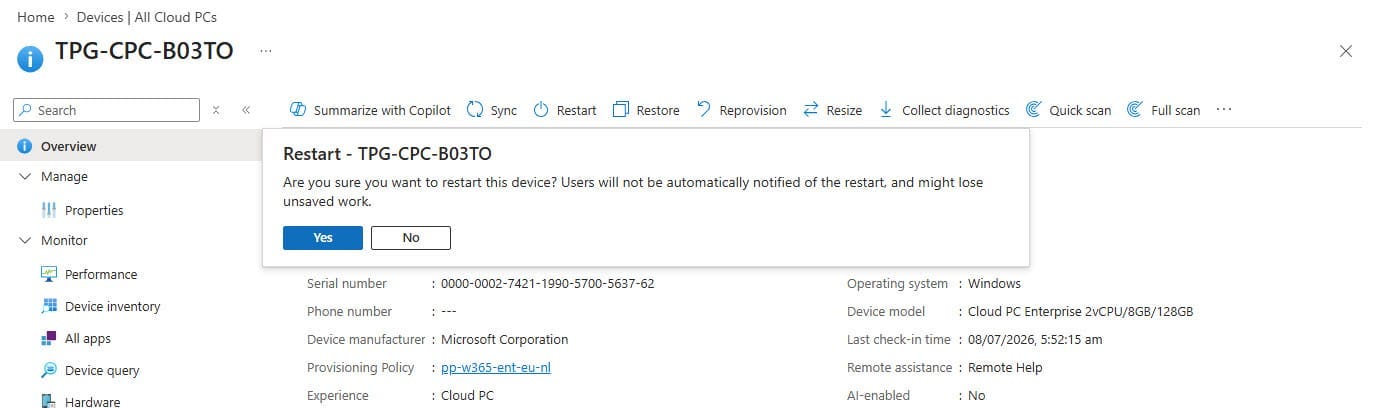
💡Always inform users before restarting their Cloud PC. Although the action is quick, any unsaved work will be lost.
Restoring a Cloud PC
This is probably one of my favorite Windows 365 features. Instead of rebuilding an entire desktop after something goes wrong, you can restore the Cloud PC to an earlier restore point.
In many situations, this saves hours of troubleshooting.
When should you use Restore?
Examples include:
A faulty software installation
Corrupted Windows components
Configuration changes causing instability
Testing software that didn't go as planned
How to restore a Cloud PC
Open Devices → Manage Windows 365 Cloud PCs → All Cloud PCs.
Select the Cloud PC.
Click Restore.
Select the desired restore point.
Click Restore again.
Confirm the action.
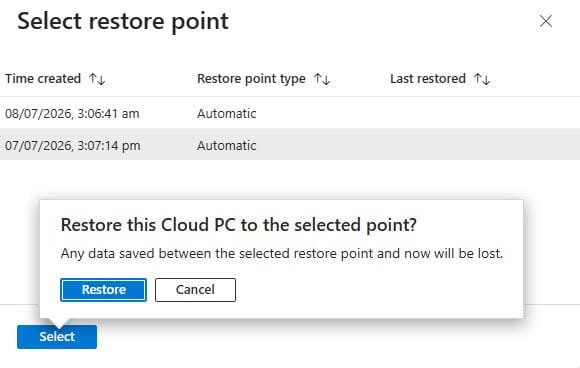
Things to know
The operating system is restored to the selected point in time.
Applications installed after that restore point may need to be reinstalled.
Files stored in OneDrive remain unaffected.
Restore requires point-in-time restore to be configured/enabled first.
💡Before reprovisioning a Cloud PC, always check whether a restore point can solve the problem first. It usually takes only a fraction of the time required to build a new Cloud PC.
Resizing a Cloud PC
Business requirements change, and so do user workloads. Fortunately, Windows 365 allows administrators to resize a Cloud PC without starting from scratch.
Whether a developer needs additional RAM or a project requires more processing power, resizing is a straightforward operation.
Typical scenarios
Developers
Engineers
Designers
Temporary projects
Power users
How to resize a Cloud PC
Open Devices → Manage Windows 365 Cloud PCs → All Cloud PCs.
Select the Cloud PC.
Click Resize.
Choose one of the available license configurations.
Confirm the resize operation.
Things to know
Only supported upgrade paths are displayed.
The Cloud PC will restart during the resize.
User data and installed applications remain available.
Resize depends on available license inventory and Enterprise disk downgrades aren't supported.
💡More CPU or memory isn't always the answer. Check Task Manager or Endpoint Analytics before assuming the Cloud PC needs a larger SKU.
Reviewing Cloud PC information
Every Cloud PC contains a wealth of operational information that can help administrators and helpdesk engineers troubleshoot issues.
Some of the most useful properties include:
Provisioning Status
Device Health
Assigned User
Provisioning Policy
Cloud PC Size
Region
Last Sign-in
Device Name
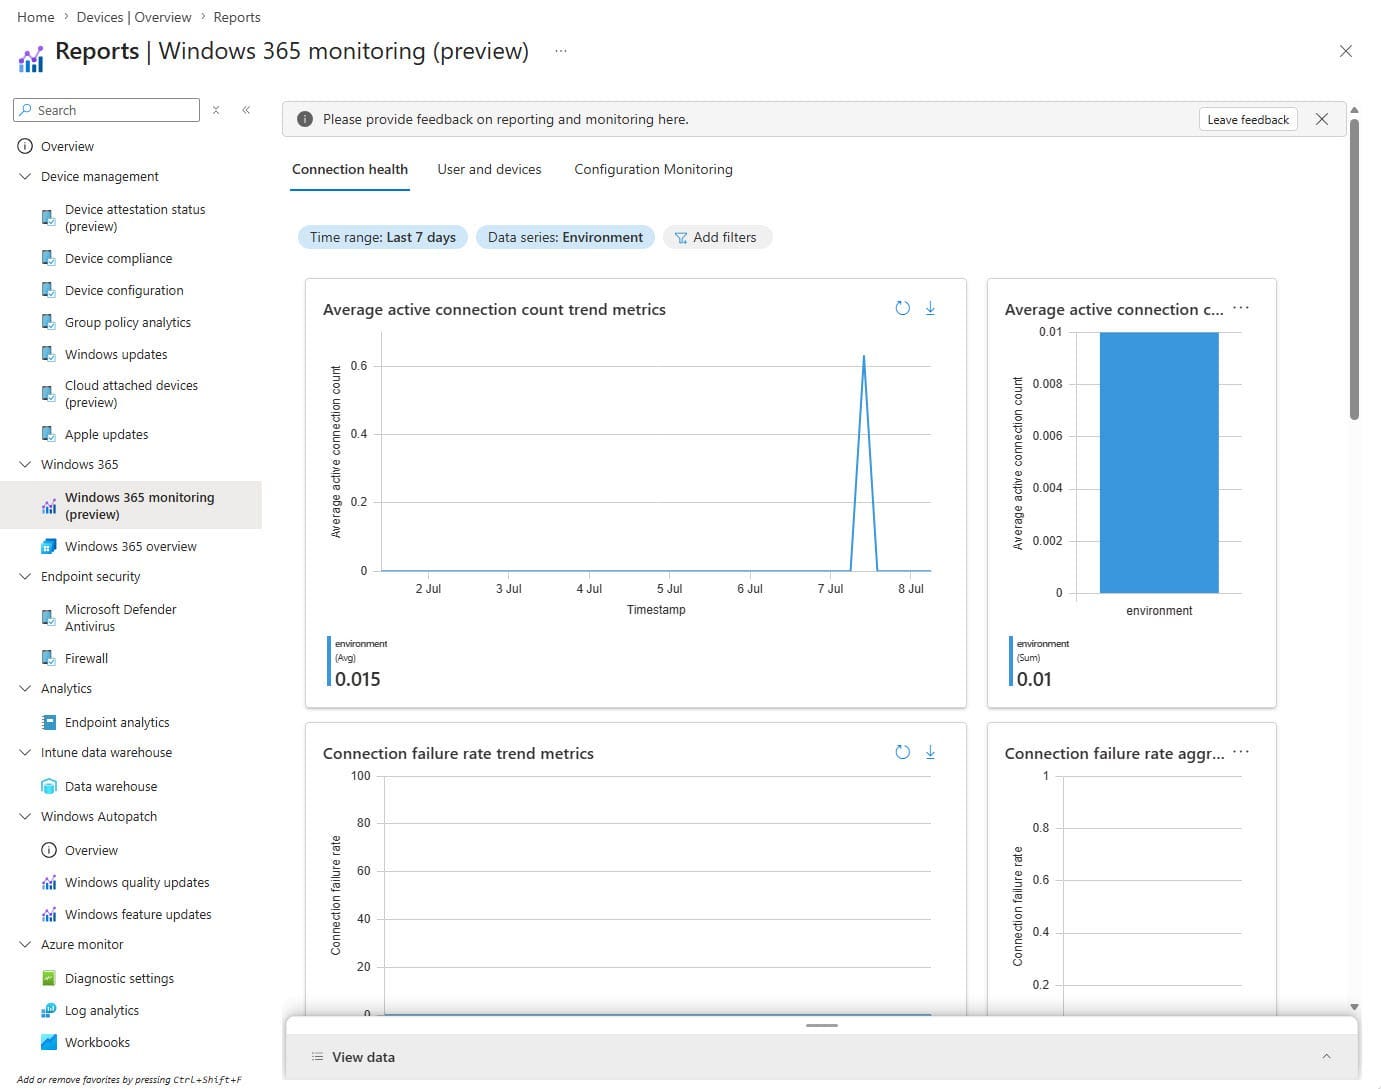
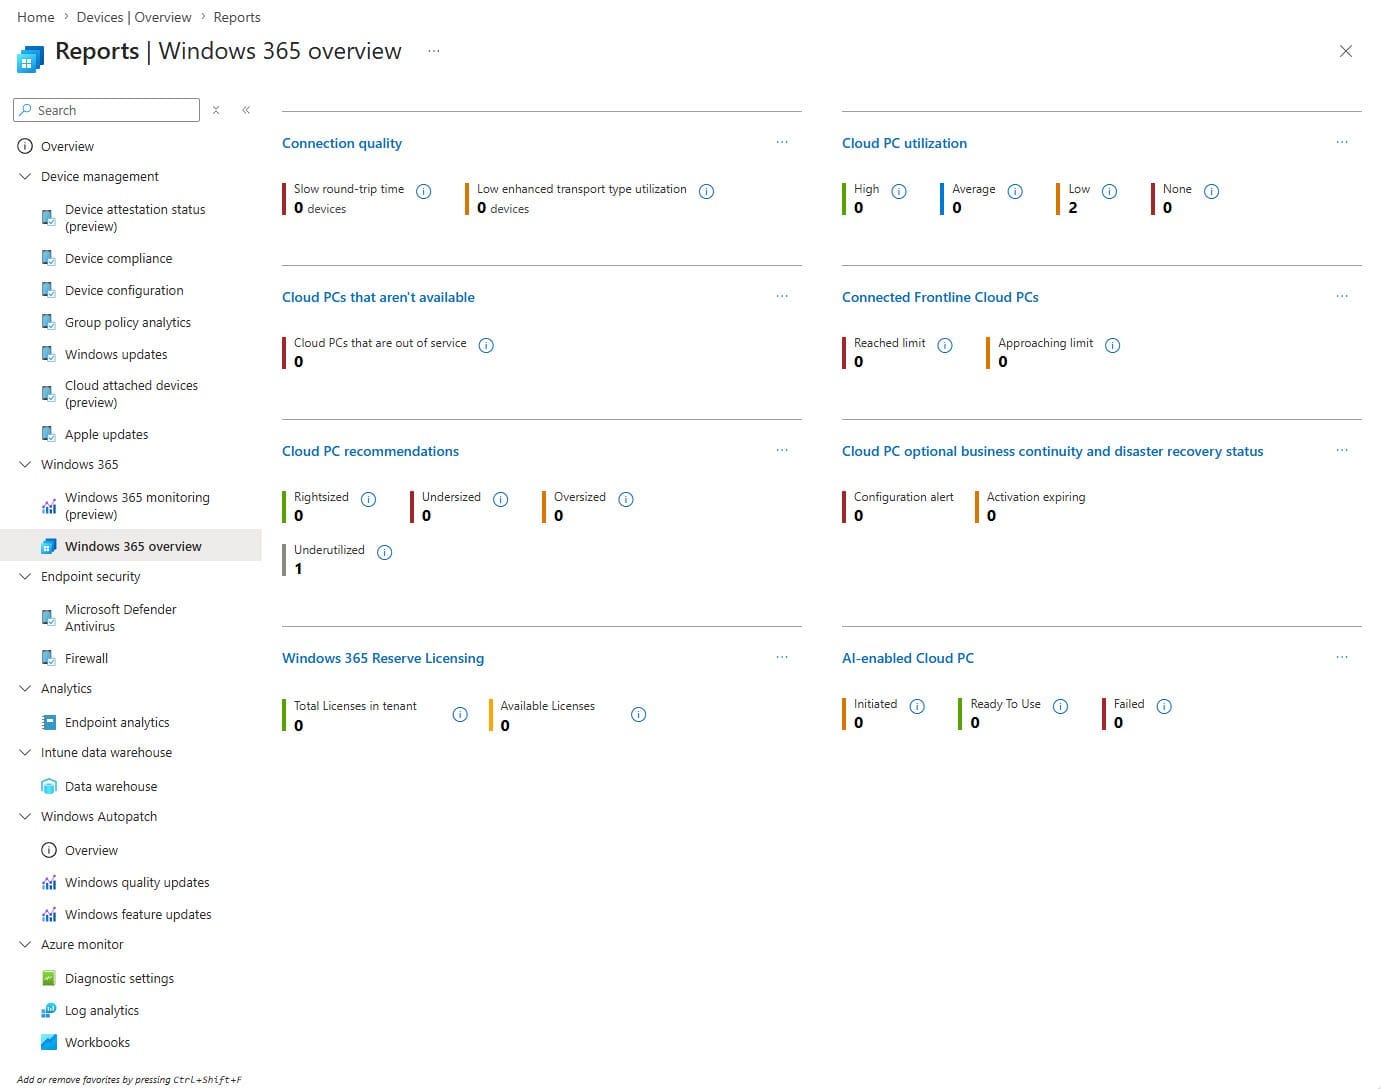
Knowing where to find this information can often save valuable troubleshooting time. You can find some overviews about the Cloud PCs at Reports → Windows 365 → Windows 365 monitoring (prview) or Windows 365 overview
Best Practices
After working with Windows 365 in several customer environments, a few recommendations consistently stand out.
Keep your Cloud PCs standardized
Avoid creating unnecessary image variations or provisioning policies.
The more standardized your environment is, the easier it becomes to manage.
Use Restore before Reprovision
Reprovisioning should not be your first reaction.
Whenever possible, try a Restore first.
Resize only when necessary
A larger Cloud PC also means higher licensing costs.
Validate whether the bottleneck is actually hardware-related before upgrading.
Manage Cloud PCs like any other endpoint
Windows 365 doesn't require a completely new management strategy.
Continue using:
Configuration Profiles
Compliance Policies
Security Baselines
Application Deployment
Windows Autopatch / Windows Update policies
A Cloud PC is simply another Windows endpoint managed through Intune.
Final Thoughts
Provisioning a Cloud PC is only the beginning.
Windows 365 includes several management capabilities that can significantly reduce operational overhead while improving the end-user experience.
Understanding features like Restart, Restore, and Resize enables administrators to resolve issues more quickly and keep users productive with minimal disruption.
In the next part of this series, we'll look at Windows Autopatch and explore how to keep Cloud PCs secure, compliant, and automatically up to date.
That is it for now. Until next time. 👋